If you have ever wondered how to diffuse wavy/curly hair for maximum volume, how to get bigger curls without creating ugly frizz, or whether you should actually dry your hair all the way to 100%, you are in the right place.
A diffuser can completely transform your wash day. Used correctly, it can help enhance your natural curl pattern, create root volume, improve definition and help your hairstyle last longer. Used with too much heat, too much airflow or too much movement, however, it can quickly turn beautifully defined curls into frizz.
So, how do you diffuse curly or wavy hair properly?
The key is not simply using a diffuser. It is how you use it while your hair is drying.

Should you diffuse curly hair until it is 100% dry?
For maximum volume and a more set hairstyle, we recommend experimenting with drying your hair all the way to 100% dry.
Why?
Wet hair is heavier than dry hair. While your hair is still wet, that extra water weight can pull your curls and waves downward, particularly around the roots. If you stop diffusing while your hair is still damp and allow it to finish drying naturally, your pattern continues to change as the remaining moisture evaporates.
Fully drying your hair with a diffuser allows you to set the shape and position you created during styling.
This can be particularly useful if your goal is:
- Maximum root volume
- More defined curls and waves
- A bouncier finish
- Better shape retention
- Longer-lasting styling
That said, 100% dry does not mean you should keep blasting your hair with high heat until it feels hot or brittle. The goal is simply to remove the remaining moisture while using low heat and low airflow.
If your hair becomes dry, brittle or excessively frizzy when diffusing, experiment with stopping slightly earlier and allowing the last little bit to air dry.
How to Diffuse Curly Hair Step by Step
Here is our Curlhop technique for creating maximum volume, definition and shape with a diffuser.
Step 1: Finish your styling routine
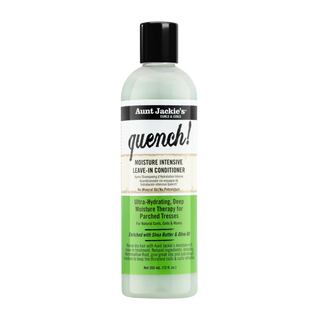
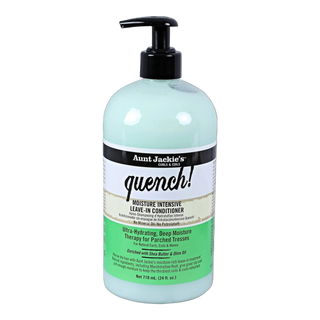
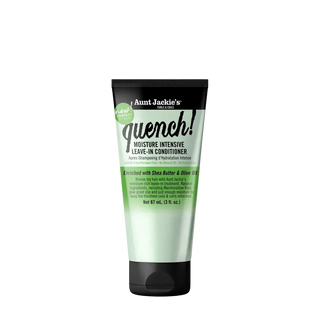
Start with your usual styling products on wet hair.
Depending on your hair type and desired result, this might include:
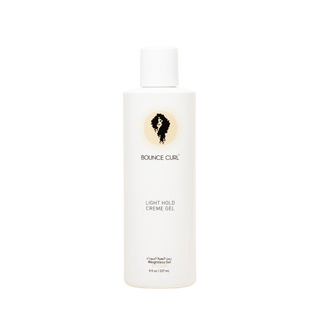
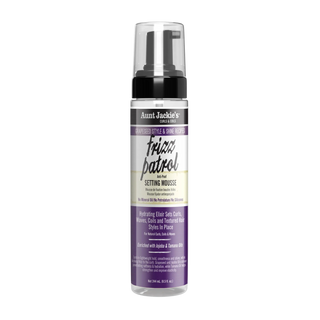
Leave-in conditioner → curl cream → mousse → gel
You do not need every product. Choose the combination that works for your hair.
For maximum volume, be particularly careful with heavy creams and oils. Fine or wavy hair can easily become weighed down, while thicker or drier curls may benefit from richer styling products.
Once your products are applied, scrunch your hair upwards to encourage your natural curl or wave pattern.
Step 2: Remove excess water with a microfiber towel or cotton T-shirt
Before reaching for your diffuser, gently remove some of the excess water.
Use a microfiber towel or a cotton T-shirt and gently scrunch your hair upwards.
Do not rub your hair back and forth.
Rubbing creates unnecessary friction and can disturb your curl clumps, leading to more frizz.
Think: Scrunch, squeeze, release.
Not: Rub, twist, attack.
Step 3: Set your diffuser to low heat and low speed
Attach your diffuser and start with:
Low heat + low airflow
This gives you much more control over your curls and reduces the chance of your airflow blowing the curl pattern apart.
A diffuser works by spreading the airflow over a larger area rather than directing one concentrated stream of air at your hair.
This is why it is so useful for curly and wavy hair.
Hover Diffusing vs. Cup Diffusing: Which Is Better?
This is one of the most common questions about diffusing curly hair.
What is hover diffusing?
Hover diffusing means holding the diffuser slightly away from your hair, allowing air to circulate around the curls without physically placing them inside the diffuser bowl.
It is particularly useful if your priority is:
Less manipulation + less frizz + preserving an already-defined curl pattern.
Many curly hair routines recommend starting with hover diffusing because it allows the outer layer of the hair to begin drying without disturbing the curls.
What is cup diffusing?
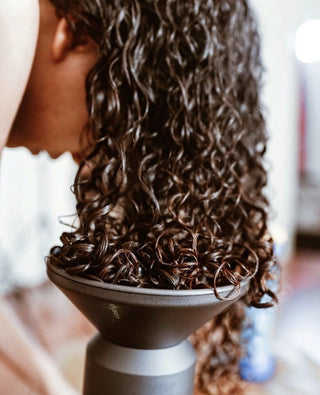
Cup diffusing, sometimes called pixie diffusing, is when you gently place the ends of a section inside the diffuser bowl and then bring the diffuser upwards towards your scalp.
This is the technique we love when the goal is maximum curl definition (we'll talk about volume later).
Instead of allowing wet curls to hang downward while they dry, you are gently supporting them upwards.
And this brings us to one of the biggest Curlhop volume tips.
For Maximum Volume: Cup Diffuse Towards the Roots
Instead of simply holding the diffuser underneath your hair, scoop your curls into the diffuser bowl and slowly bring the bowl towards your scalp.
Once you reach the roots, hold the diffuser relatively still for a short period.
Then:
Lower the diffuser → gently move to another section.
This helps prevent the airflow from blowing your curls apart while you move between sections. Cup or pixie diffusing is widely used to encourage tighter curl formation and root volume.
Work around your head until both the lengths and roots are gradually drying.
Should You Diffuse Upside Down for More Volume?
YESSS
Flipping your hair upside down and moving it from side to side while diffusing can help prevent the roots from drying flat against the scalp.
For maximum volume, try alternating between:
Head upright → left side → right side → upside down
This changes the direction in which the roots dry and prevents them from becoming permanently set in one flat position.
If flipping upside down creates awkward curl clumps or too much frizz, simply work side to side while keeping your head in a comfortable position.
The goal is root elevation, not performing acrobatics with your hair dryer.
The 70–80% Dry Stage: Add More Hold
Once your hair is around 70–80% dry, you can add another layer of hold if your hair needs extra longevity.
For example, Bounce Curl Hair Spray can be lightly misted over the hair to add additional hold and help support volume.
The more hold you use, the stronger the final cast and hold can be, so start with a light layer and build gradually.
This is especially useful if your hair tends to:
- Lose its shape quickly
- Fall flat during the day
- Struggle to maintain root volume
- Become affected by humidity
Then continue diffusing using the cup method.
The Secret to Bigger Hair: Change Directions
Once your hair has developed some structure, it is time to focus on volume.
Do not dry your entire head in one fixed position.
Instead, rotate your hair:
Right → cup diffuse → left → cup diffuse → forward → cup diffuse → upside down → cup diffuse → back to the other side →cup diffuse
This helps the roots dry in different directions and prevents your curls from sitting in one compressed position.
As you move around your head, continue gently cupping sections into the diffuser.
The goal is to create lift without aggressively disturbing the curl clumps.
When Your Hair Is 90% Dry: Lift the Roots
Now comes the fun part.
Once your hair is approximately 90% dry, use your fingertips to gently lift and loosen your roots.
Place your fingers underneath the hair near the scalp and gently move them around.
You can also gently shake the roots to create more separation and volume.
Avoid dragging your fingers through the lengths.
Continue diffusing until the hair is completely dry.
Why Does My Hair Look Better When It Is 100% Dry?
If your hair always looks amazing while it is wet but loses volume once it dries, this is particularly important.
While your hair is wet, the curls are temporarily grouped together and weighed down by water.
As the hair dries, the curl pattern becomes more stable.
By allowing the hair to become completely dry while positioned for volume, you give the styling products and your natural pattern time to set.
This is why some people notice that their curls look:
bigger + bouncier + more defined
after a complete diffusing session.
However, every head of hair behaves differently. Some people may prefer to stop around 80–90% dry and allow the rest to air dry, especially if they are prone to frizz or dryness. The best approach is to experiment and see where your own hair gives you the best balance between volume, definition and softness.
How to Diffuse Curly Hair Without Frizz
Want volume without the halo of frizz?
Remember these five rules:
1. Keep the airflow low
High airflow can disturb your curl clumps.
2. Keep your hands out of your hair
The more you touch curls while they are drying, the greater the chance of disrupting their shape.
3. Move the hair towards the diffuser. Not the diffuser towards the hair.
Place, dry, release and move to the next section.
4. Use low heat
You want controlled drying, not maximum heat.
5. Do not break the cast until your hair is completely dry
Wait until the hair is 100% dry before touching or scrunching it.
What Is a Curl Cast?
If your hair feels crunchy, stiff or hard after diffusing, congratulations.
You probably have a cast.
A cast is the temporary firm layer created by styling products, particularly gels, mousses and hairsprays, as they dry around the hair.
It is not the final texture.
And this is exactly why you should not judge your curls immediately after diffusing.
First:
Dry completely.
Then:
Scrunch out the cast.
How to Scrunch Out the Crunch
Once your hair is completely dry, take a small amount of lightweight hair oil and warm it between your palms.
Then gently scrunch your curls upwards.
The cast will soften and break, leaving you with:
Soft curls + definition + volume + shine.
Avoid applying too much oil. A few drops are usually enough.
Remember:
You can always add more. You cannot easily remove too much.
How to Keep Your Curls Voluminous Overnight
Your wash day does not end when the diffuser switches off.
How you sleep can make a huge difference to your second-day hair.
Try sleeping with:
and/or
Satin reduces friction between your hair and your pillow, which can help minimise frizz and preserve your curl pattern overnight.
Your Ultimate Diffusing Routine for Maximum Volume
Save this for your next wash day:
1. Style on wet hair
Apply your chosen curl products and scrunch.
2. Micro-plop
Use a microfiber towel or cotton T-shirt to remove excess water.
3. Diffuse on low heat + low airflow
Start gently.
4. Cup diffuse
Scoop the curls into the diffuser and bring them towards the scalp.
5. Work around the whole head
Dry both lengths and roots.
6. Change directions
Right, left, forward and upside down for maximum root lift.
7. At 70–80% dry
Add a light layer of hairspray if you want additional hold.
8. Continue cup diffusing
Keep lifting the curls towards the roots.
9. At 90% dry
Gently fluff your roots with your fingertips.
10. Dry to 100%
Make sure there are no damp sections, especially around the roots.
11. Do not touch until completely dry
Then scrunch out the cast.
12. Add a tiny amount of oil
Warm it between your palms and scrunch.
13. Protect your curls overnight
Satin pillowcase or bonnet.
FAQ: Your Most-Common Diffusing Questions
Is it better to air dry or diffuse curly hair?
Neither method is universally better. Air drying involves less direct heat, while diffusing can significantly reduce drying time and gives you much more control over the position of your curls and roots. If volume is your priority, diffusing is often worth trying.
Is it better to diffuse curly hair upside down?
It can be. Upside-down diffusing can help create root lift because the hair is positioned away from the scalp. However, some curl patterns form better when dried upright or from side to side.
Should I hover diffuse or cup diffuse?
Hover diffusing is excellent for minimising manipulation and preserving your existing curl pattern. Cup diffusing is excellent when you want to encourage curl formation, shrinkage and volume. You can also combine both techniques.
Should curly hair be completely dry before you stop diffusing?
If you are aiming for maximum volume and a fully set style, try drying to 100%. However, some hair types, especially fine or frizz-prone curls, may prefer to stop slightly earlier and air dry the final portion.
Why does my curly hair get frizzy when I diffuse?
Common causes include high airflow, excessive touching, moving the diffuser too aggressively, using too much heat, not using enough gel or disturbing the curls before they are dry.
How do I get more volume when diffusing?
Use low airflow, cup diffuse towards the roots, change the direction of your hair while drying, flip your head or work from side to side, and gently fluff your roots once they are around 90% dry.
Why are my curly hair roots flat after diffusing?
Your roots may be weighed down by water or heavy products, or they may simply have dried in a flat position. Try using lighter products near the roots, changing your head position while diffusing and targeting the roots directly once the lengths have started to dry.
Can I use hair oil before diffusing?
Oil is used after the hair is completely dry to break the cast and add shine.
The Curlhop Takeaway
The perfect diffuser routine is not about using the hottest temperature, the strongest airflow or the most products.
It is about controlling the drying process.
Create your curl pattern while your hair is wet. Remove excess water gently. Diffuse slowly. Lift the roots. Change directions. Let the styling products form their cast. And, if your hair responds well to it, take your hair all the way to 100% dry before you break that cast.
Because sometimes the difference between flat curls and BIG, bouncy, defined curls is simply giving your hair enough time to dry in the shape you actually want

Done! Less rushing. More volume. Better curls.